> ## Documentation Index
> Fetch the complete documentation index at: https://docs.pre.dev/llms.txt
> Use this file to discover all available pages before exploring further.
# Creating a Project
> Three ways to start a project on pre.dev.
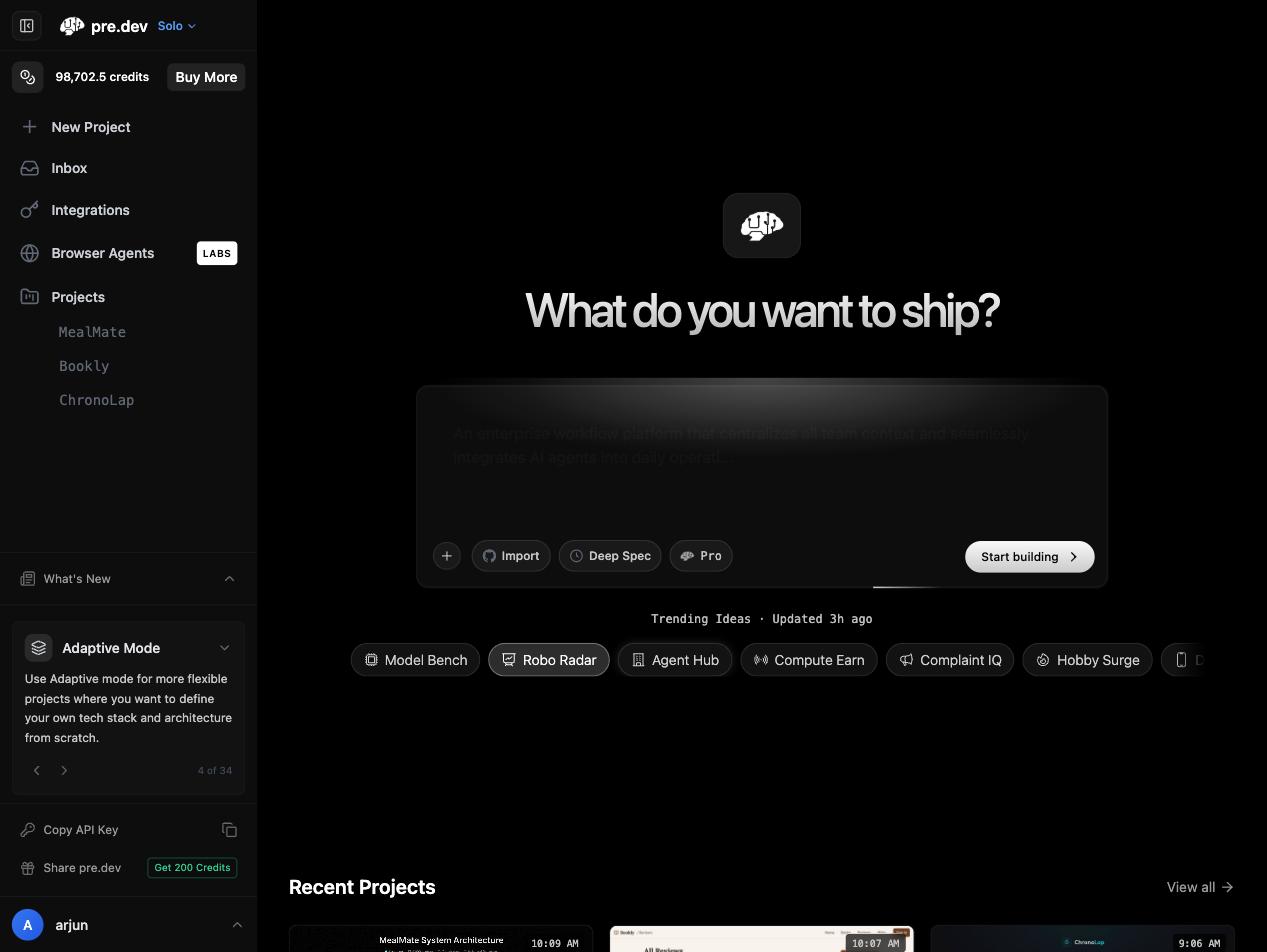 There are two ways to start: describe what you want to build, or import an existing repo.
Type what you want to build into the prompt box and hit **Start building**. pre.dev's planning engine analyzes your requirements, picks the stack and architecture, and generates the spec — you review it before any code is written.
Two toggles shape the run:
* **Deep Spec** — a more comprehensive plan with granular subtasks (see [Fast vs Deep](/coding-agent/specifications/fast-vs-deep))
* **Pro** — the strongest models on every phase (see [Pro Mode](/coding-agent/building/pro-mode))
**Example input:**
```
A collaborative whiteboard app with real-time drawing,
sticky notes, video chat, and export to PDF.
The app should support teams of up to 50 people.
```
Connect an existing GitHub repository and continue building on it. pre.dev reverse-engineers the existing codebase — understanding the tech stack, patterns, and architecture — then generates specs for new features that integrate seamlessly.
**When to use:**
* You have an existing project you want to extend
* You're adding features to a codebase you didn't build
* You want AI agents to work within your established patterns
See [Importing Repos](/coding-agent/projects/importing-repos) for detailed instructions.
## Writing a Good Project Description
The quality of your specification depends on how well you describe your project. Here are tips:
**Include:**
* What the app does (core functionality)
* Who uses it (target users)
* Key features you want
* Any technical constraints (specific APIs, compliance needs, platform targets)
* Scale expectations (number of users, data volume)
**Example — vague (less optimal):**
```
Build me a chat app
```
**Example — detailed (much better):**
```
Build a team messaging app similar to Slack with:
- Real-time channels and direct messages
- File sharing with drag-and-drop upload (up to 50MB)
- Message search across all channels
- Threaded replies
- @mentions with notifications
- Integration with GitHub for commit notifications
Target: small teams of 5-20 people.
Stack preference: React frontend, Node.js backend, PostgreSQL.
```
## After Creation
Once your project is created and the specification is generated:
Add, remove, or modify milestones and stories
Connect keys for external services agents will need
Choose a build mode and let agents work
There are two ways to start: describe what you want to build, or import an existing repo.
Type what you want to build into the prompt box and hit **Start building**. pre.dev's planning engine analyzes your requirements, picks the stack and architecture, and generates the spec — you review it before any code is written.
Two toggles shape the run:
* **Deep Spec** — a more comprehensive plan with granular subtasks (see [Fast vs Deep](/coding-agent/specifications/fast-vs-deep))
* **Pro** — the strongest models on every phase (see [Pro Mode](/coding-agent/building/pro-mode))
**Example input:**
```
A collaborative whiteboard app with real-time drawing,
sticky notes, video chat, and export to PDF.
The app should support teams of up to 50 people.
```
Connect an existing GitHub repository and continue building on it. pre.dev reverse-engineers the existing codebase — understanding the tech stack, patterns, and architecture — then generates specs for new features that integrate seamlessly.
**When to use:**
* You have an existing project you want to extend
* You're adding features to a codebase you didn't build
* You want AI agents to work within your established patterns
See [Importing Repos](/coding-agent/projects/importing-repos) for detailed instructions.
## Writing a Good Project Description
The quality of your specification depends on how well you describe your project. Here are tips:
**Include:**
* What the app does (core functionality)
* Who uses it (target users)
* Key features you want
* Any technical constraints (specific APIs, compliance needs, platform targets)
* Scale expectations (number of users, data volume)
**Example — vague (less optimal):**
```
Build me a chat app
```
**Example — detailed (much better):**
```
Build a team messaging app similar to Slack with:
- Real-time channels and direct messages
- File sharing with drag-and-drop upload (up to 50MB)
- Message search across all channels
- Threaded replies
- @mentions with notifications
- Integration with GitHub for commit notifications
Target: small teams of 5-20 people.
Stack preference: React frontend, Node.js backend, PostgreSQL.
```
## After Creation
Once your project is created and the specification is generated:
Add, remove, or modify milestones and stories
Connect keys for external services agents will need
Choose a build mode and let agents work